Force Sensor on Airpods Pro is one of the most meaningful innovations for wireless earbuds control. It is a far superior solution compared to the touch control as in most other wireless earbuds.
This AirPods Pro guide explains what the Force Sensor on AirPods Pro is, how to use the Force Sensor to control music playing, handle calls, switch noise control modes, and launch Siri. The customization of the press speed and press duration of the Force Sensor on AirPods Pro is also illustrated.
Update: the latest AirPods 3 also features an almost identical Force Sensor. So, this guide also applies to AirPods 3 if you want to learn to use Force Sensor on AirPods 3.
The differences between AirPods Pro and Air Pods 3 are discussed in this guide.
Update 2: the 2nd generation of AirPods Pro (aka AirPods Pro 2) added touch controls to the stem. In addition to all the features included in this guide, AirPods Pro 2 allows you to adjust the volume by swiping up and down.
Update 3: in iOS 17, some new features were added to AirPods Pro 2, AirPods Pro, AirPods 3, AirPods Max, and AirPods Pro 3. You can use the force sensor to mute and unmute yourself during a call now.
What is Force Sensor on AirPods Pro?
Due to its tiny size, it is usually hard to control wireless earbuds easily.
For example, Jabra Elite Sport used the old-style buttons (Multifunction button, Sports button, volume up button, and volume down button). Many owners complained it is too painful when pressing these buttons.
Most other wireless earbuds (including Apple's own AirPods 2) in the market use touch control. For example, all Samsung's wireless earbuds, including Galaxy Buds, Buds+, Buds Live, Buds Pro, and Buds 2, use similar touch controls. The most common issue with touch control is inadvertent touch. For this reason, Samsung added the “block touches” option in the Galaxy Wearable app to turn off the touch control.
Now, you may understand the powerfulness of the Force Sensor on AirPods Pro. And actually Samsung just shamelessly copied the stemmed design and control on its latest Galaxy Buds 3 and Galaxy Buds 3 Pro.
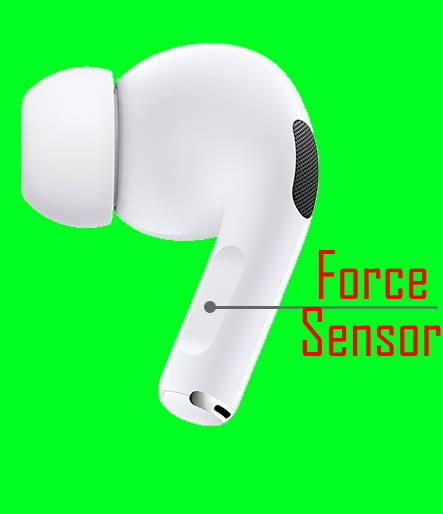
You need to “press” the Force Sensor, which is located in the recessed area near the end of the stem, to control AirPods Pro, as shown in the picture below.
Compared to using buttons or touch control, the Force Sensor at least solves the following four questions.:
- It will not cause any pain to your ear. You just press the Force Sensor.
- It will not dislodge AirPods Pro in your ear,
- It will not push AirPods Pro further into the ear.
- It will not be pressed inadvertently.
Technically, the Force Sensor is similar to touch control. It only adds a force threshold. If the force (pressure, to be precise) is lower than the threshold, no action is taken. The sensor will trigger corresponding actions only if the pressing force is larger than the threshold.
Many people joke about the stem (leg) in AirPods and AirPods Pro. But Apple does utilize the stem cleverly with the Force Sensor, at least on AirPods Pro.
Instead of implementing haptic feedback for the Force Sensor, AirPods Pro plays a click sound to alert you. A nice trick.
Please note, currently, among AirPods products, only AirPods Pro, AirPods 3, AirPods Pro 2, AirPods 4, and AirPods Pro 3 have the Force Sensor feature.
Please note that you can also use the stem as an iPhone camera remote.
How to use Force Sensor on AirPods Pro?
The Force Sensor on AirPods Pro is designed to control music playing, handle phone calls, control ambient sound, and launch Siri quickly.
Use Force Sensor when playing music
When listening to music (or other media) through AirPods Pro, you can:
- Press the Force Sensor once to pause (or resume) music.
- Press the Force Sensor twice to skip the current track (double-press).
- Press the Force Sensor three times to reverse to the previous track (triple-press).
To register the gesture as a twice or triple press, you need to press the Force Sensor quickly. If the duration between two presses is longer than 1 second, the gesture may be registered separately.
Of course, you can adjust the speed requirement (read on).
Use Force Sensor to handle calls
When the phone rings, by default, the call will be announced in the AirPods Pro. You can use Siri (voice assistant) to pick up or reject the call.
You can also use the Force Sensor to access more controls for phone calls:
- Press the Force Sensor once to accept (pick up) the call when the phone rings.
- Press the Force Sensor twice to reject the call.
- Press the Force Sensor once to end a call when in a call.
- If you are already on a call, and a second call rings (this feature depends on the carrier's network), you can press the Force Sensor once to put the first call on hold and pick up the second call.
- If you have calls on-hold, you can press the Force Sensor once to switch between two calls. In this case, the current call will be held and the held call will be active.
- If you have calls on-hold, you can press the Force Sensor twice to end the current call and switch to the held call.
Use Force Sensor to control noise cancelling and ambient sound
AirPods Pro offers active noise cancelling (ANC) and transparency mode. You can use the Force Sensor to switch the mode among ANC, transparency, and off. Of course, you can also do it from your iPhone.
By default, you can press and hold (long press) the Force Sensor on either of the buds to cycle through these 3 modes.
The long-press gesture can also be used for launching Siri. But it is not enabled by default. Once enabled, you can choose to use the Force Sensor on the Left or Right buds to control sound mode (read on).
Use Force Sensor to launch Siri
You can use Siri when pairing AirPods Pro with an iPhone or iPad. The simplest way to launch Siri from AirPods Pro is simply through your voice and say “Hey Siri” (followed by your commands).
If you do not want to activate Siri through voice, press and hold the Force Sensor.
As mentioned, this long-press gesture, by default, is assigned to noise control. So, you need to enable it on one (Left or Right) of the buds in the Bluetooth settings.
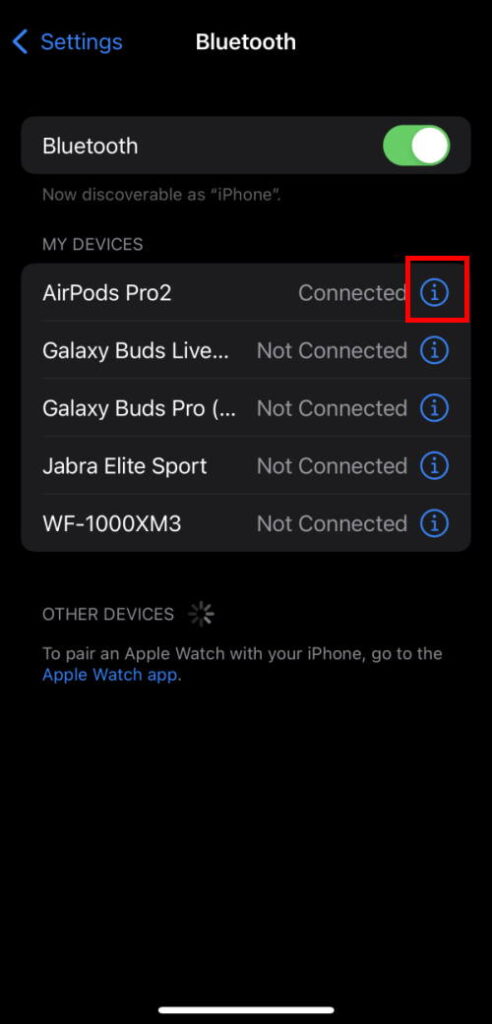
As shown in the screenshot below, you can see a list of connected or previously paired devices in the Bluetooth settings.
Tap the Information (i) icon next to AirPods Pro to access AirPods Pro settings.
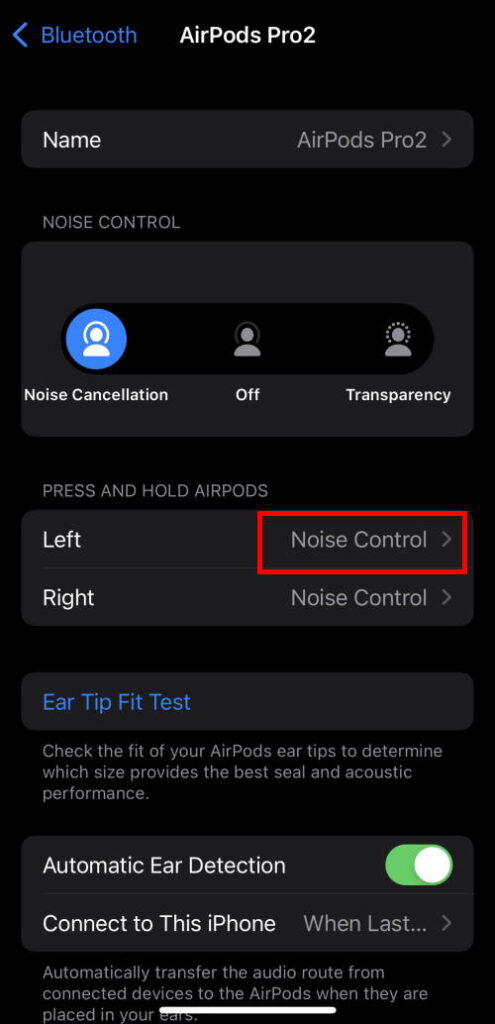
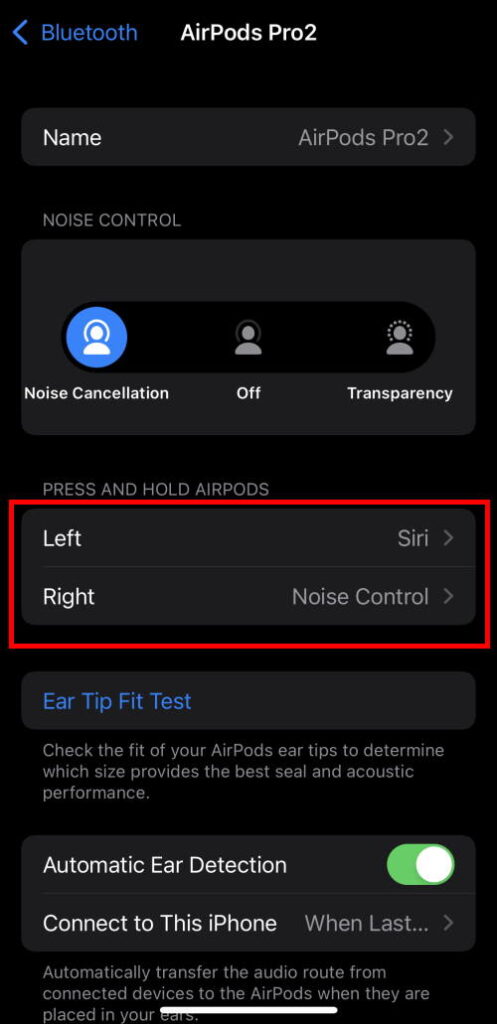
On the AirPods Pro settings page, as shown in the screenshot above, you may notice the Press and Hold AirPods gesture on both earbuds is assigned to noise control.
If you want to press and hold the left Force Sensor to launch Siri, you can tap the Noise Control field, as shown above.
In the new page to customize the long-press gesture, as shown in the screenshot below, you can tap Siri to switch this gesture from noise control to Siri.

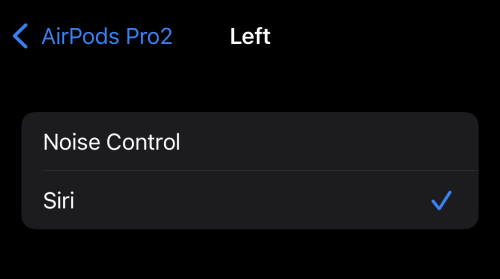
You can confirm the Siri is assigned for the long-press gesture of the left earbuds, as shown above.
Of course, on the AirPods Pro settings page, as shown below, you can find the new settings for the long-press gesture:
- Left: Siri.
- Right: Noise control.
Use Force Sensor as iPhone camera remote
You can also press the force sensor to capture photos on your iPhone, as explained in the hidden features of AirPods.
How to adjust Force Sensor on AirPods Pro?
When pressing the sensor, some 0wners may feel the default settings do not register the gestures well.
The good news is that you can customize both the press speed (for double and triple-press) and press duration (for long-press).
To adjust the press speed and press duration of the Force Sensor, you can go to Accessibility settings (I am not sure why Apple cannot make a simple AirPods app to manage the device in one location).
In the iOS settings page, as shown below, tap Accessibility to proceed.

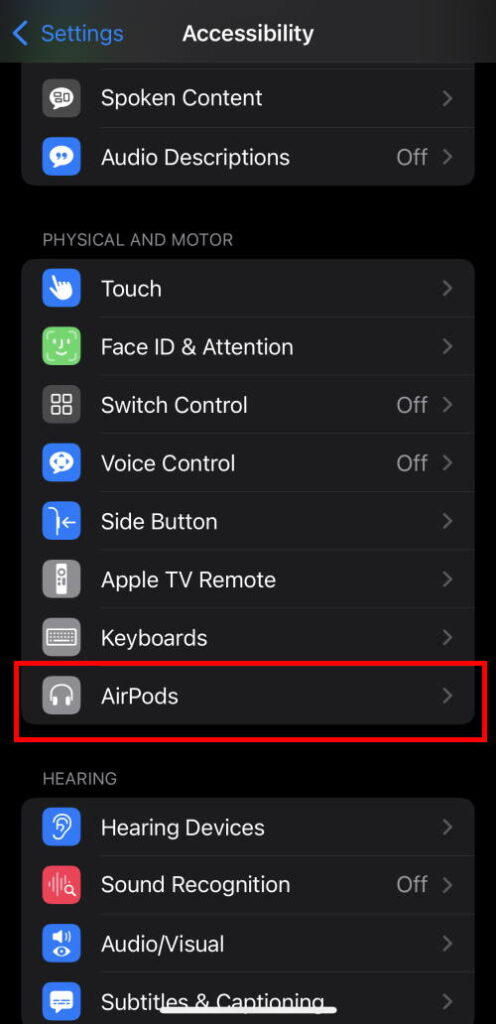
In the Accessibility settings page, as shown above, you should find the entry of AirPods.
Tap AirPods to access AirPods settings.
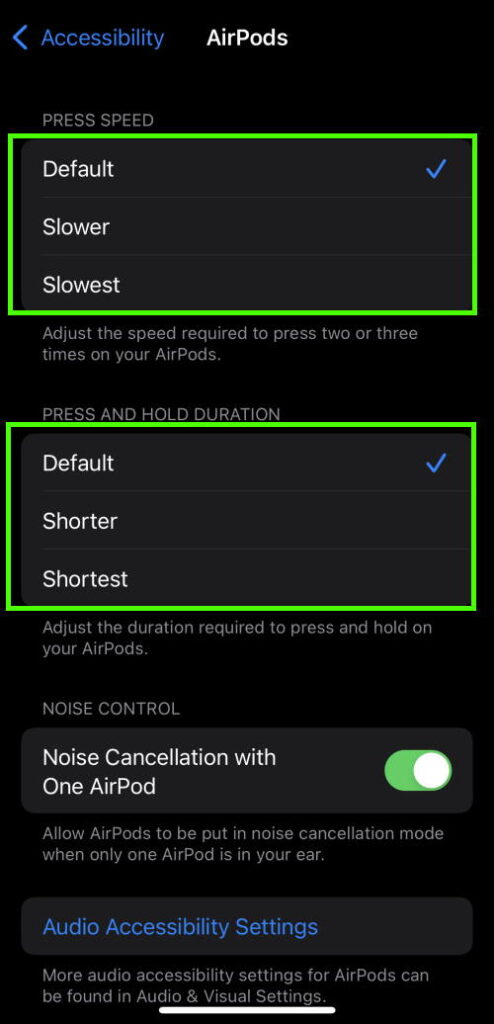
In the AirPods Settings page shown below, you can customize the press speed to:
- Default.
- Slower.
- Faster.
For the press duration of the long-press gesture for the Force Sensor, you can choose:
- Default.
- Shorter.
- Shortest.
Once you finish the adjustment, you can try the new settings to see whether they work better.
Do you have any questions on the Force Sensor on AirPods Pro? Do you know how to use and customize it?
Should you have any questions on the Force Sensor on AirPods Pro, AirPods Pro 2, and AirPods 3, please let us know in the comment box.
The community will help you.
You may check Headphone 101 for detailed explanations of headphone technologies and terms.
For Bluetooth headphone guides, please check the Bluetooth headphones section.
The sports headphones section is dedicated to guides on sports headphones.
You may also reach us through our Facebook page.

C. Charles Carso
This is essentially useless for me. I have severe bilateral arthritis and Carpal Tunnel , so the stems are USELESS for me! I cannot use siri as it won’t pickup my voice instructions. 29 years in the US Army means I do not hear much of anything when music is played, so all of the wasted space about music was just wasted time for me. The noise cancelation thing works great if I have a phone call on my apple SE (‘22) [ much clearer than the $5k of hearing aids I have, but my wife’s voice sounds like she’s at the bottom of wooden barrel 50 yards away. And the pickup of my voce has about a 10 second delay before it starts amplifying. So thus really hasn’t helped me at all.